The component starter let you design your components configuration and generate a ready to implement project structure.
| In this tutorial, we will use the component starter to generate some components for MySQL database. |
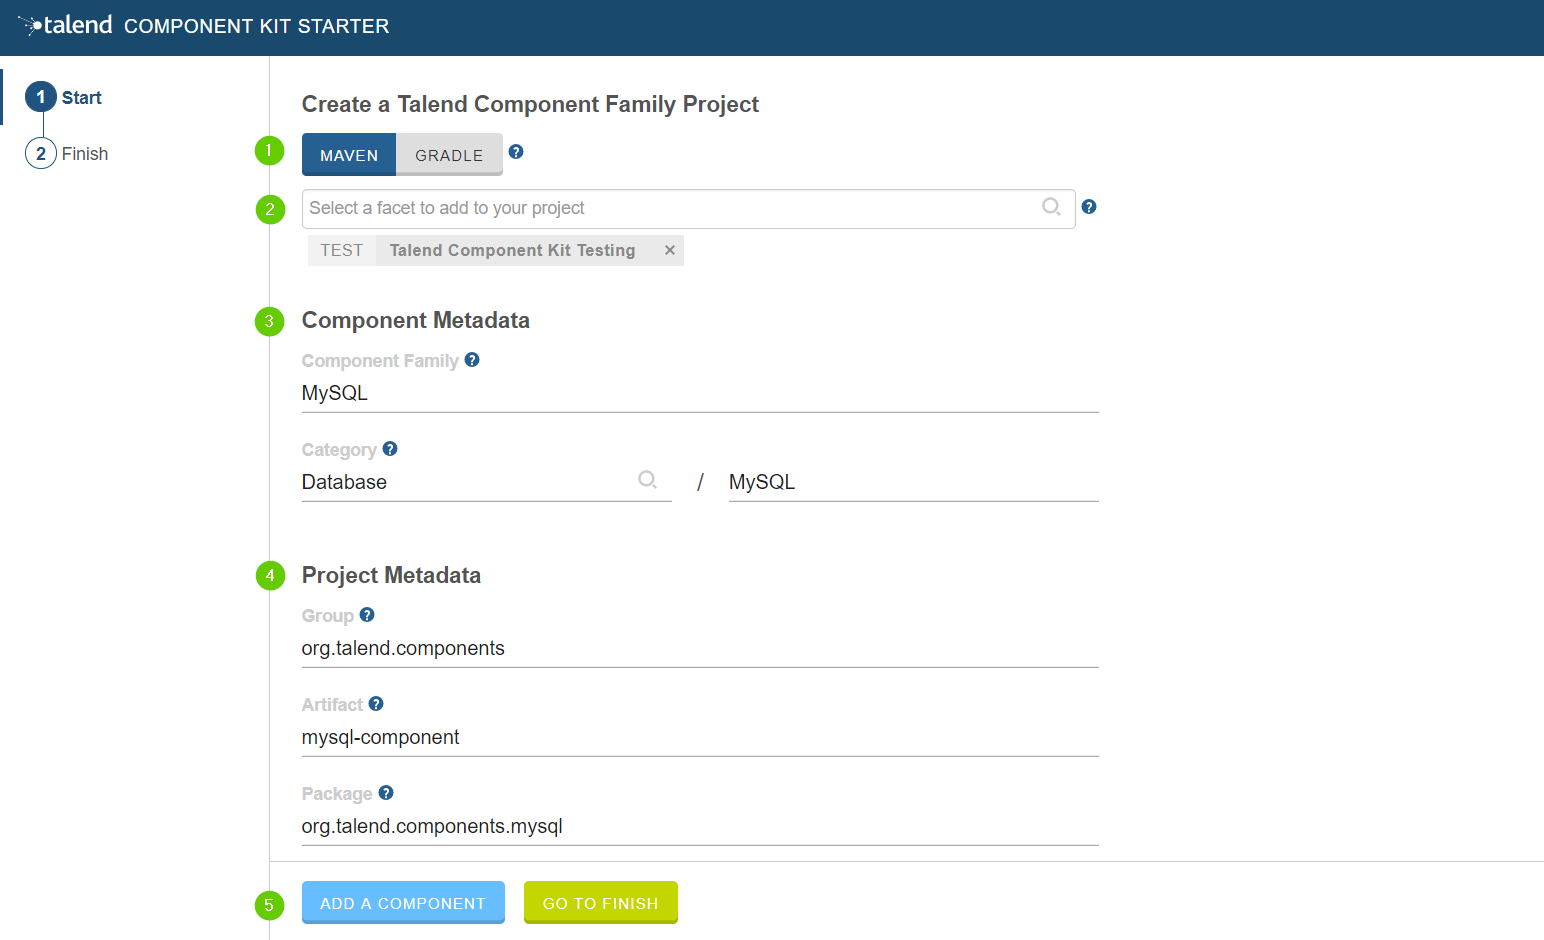
Project configuration
-
Choose your favorite build tool. we will use maven in this tutorial but you can select gradle if you prefer.
-
We add the test facet to get some unit tests generated automatically for the component that we will create after.
-
Complete the component description (family, and category).
-
Complete the project metadata. the groupId, ArtifactId and the package.
-
Click ADD A COMPONENT button to start designing your components.
Create an input component
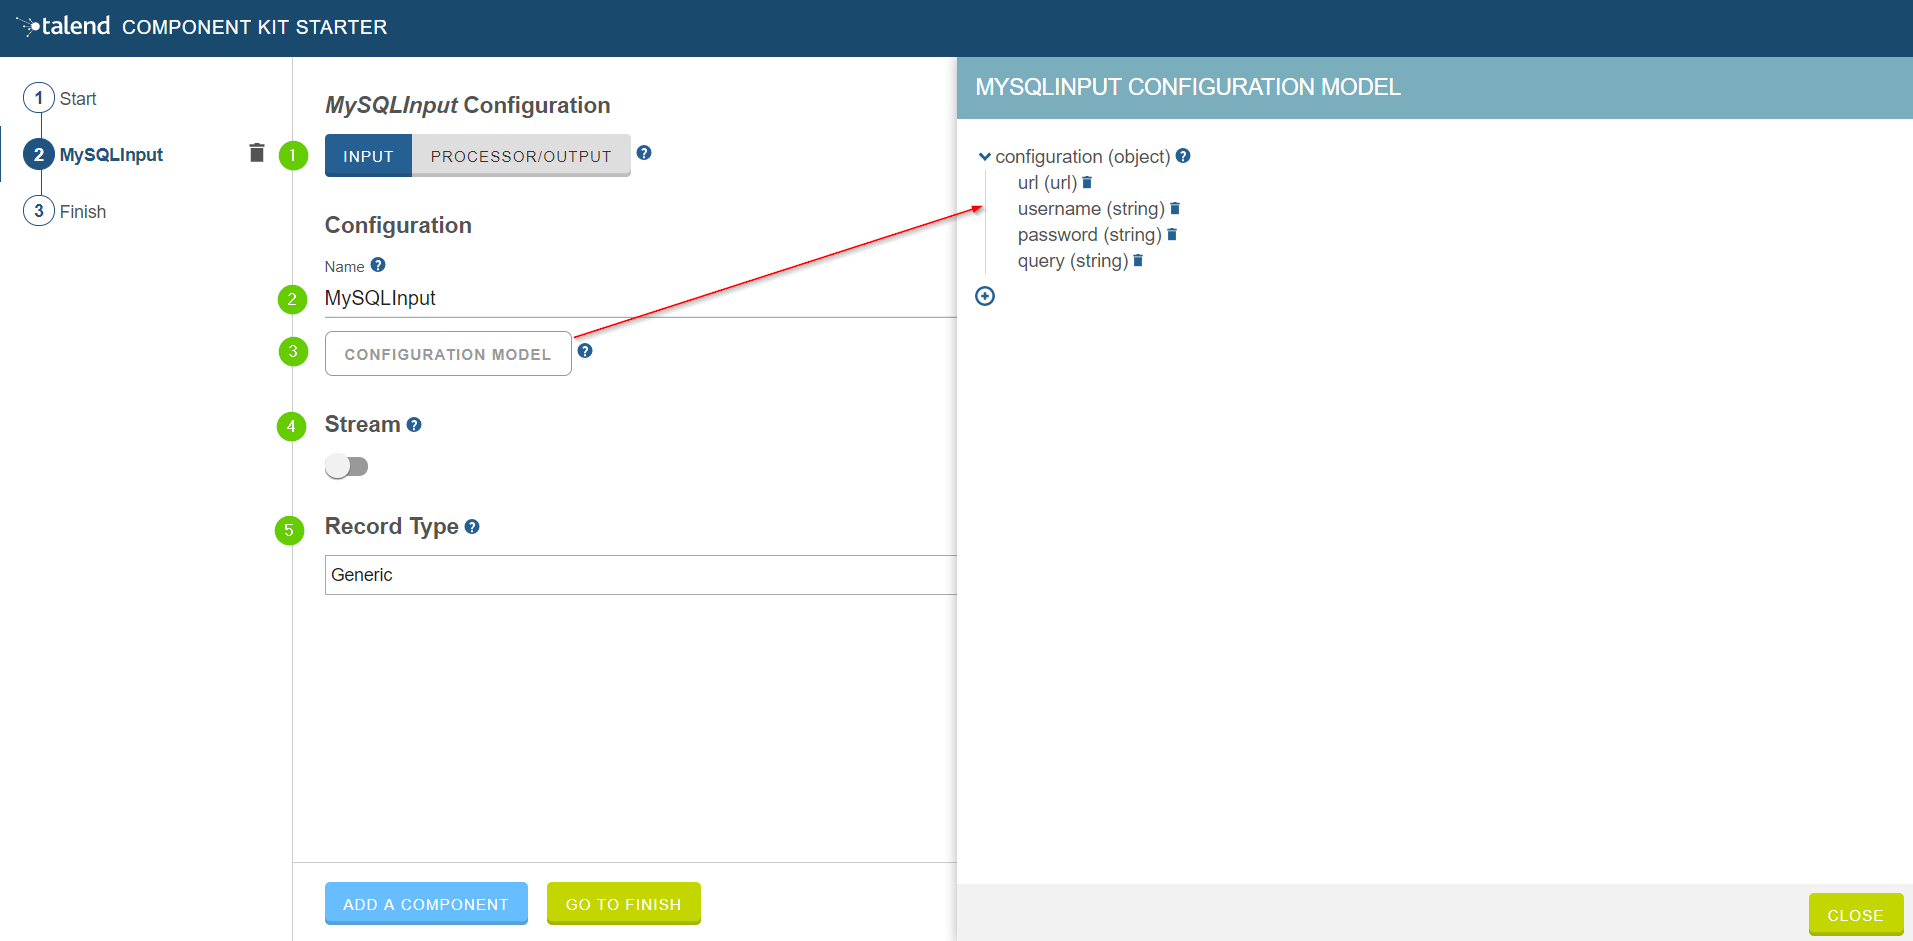
Let’s create an input component that will connect to a MySQL database, execute a SQL query and get the result.
-
We choose the component type. INPUT in this case.
-
Give the component a cool name. MySQLInput is good enough.
-
This button will let us create the required configuration for our component. To be able to execute a SQL query, we will need a connection url, the username and the password for the database and the SQL query to be executed. Click the (+) button on the right to add a field and chose it type.
-
Our component will be an ordinary (non streaming) component. so just let this toggle button off.
-
Here we define the record type that this component will produce. we let it generic for now. as our component will generate some json records. You can also choose a custom type to define a POJO that will represent your records.
Create a Processor component
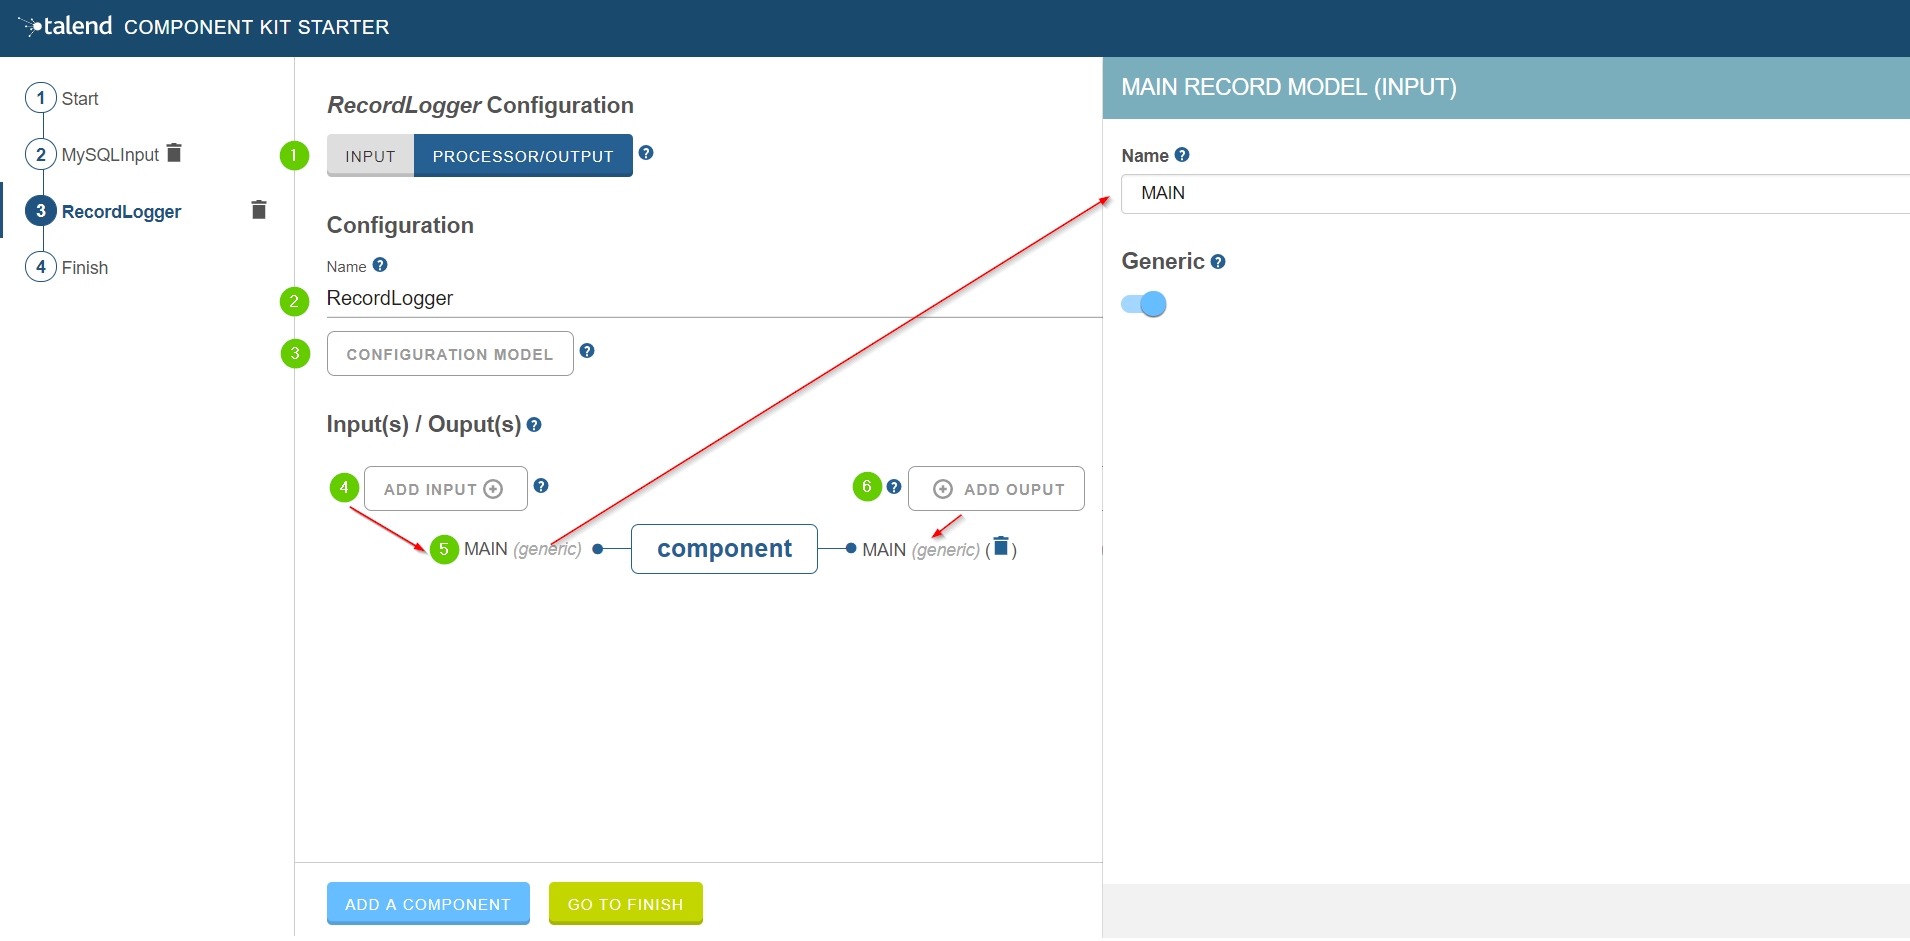
In this step we will create a very simple processor component that will receive a record, log it and return it at is.
-
Choose the component type. PROCESSOR/OUTPUT in this case.
-
Give an explicit name to the component. RecordLogger, as our processor will log the records.
-
This is the configuration button. this component don’t need any configuration. so we just skip this step.
-
Here we define the inputs of the component. so click ADD INPUT button to create an input. In this component we will have only one input that will receive the record to be log.
-
click the input name to access it configuration. you can change the name and define the record model. Here we will use a generic record. otherwise you can use a POJO to represent the record.
-
Click ADD OUTPUT to create an output for this processor. we will need only one output as our logger only emit the received record. NOTE: the outputs are also configurable in the same way as the inputs (as explained in 5).
Create an Output component
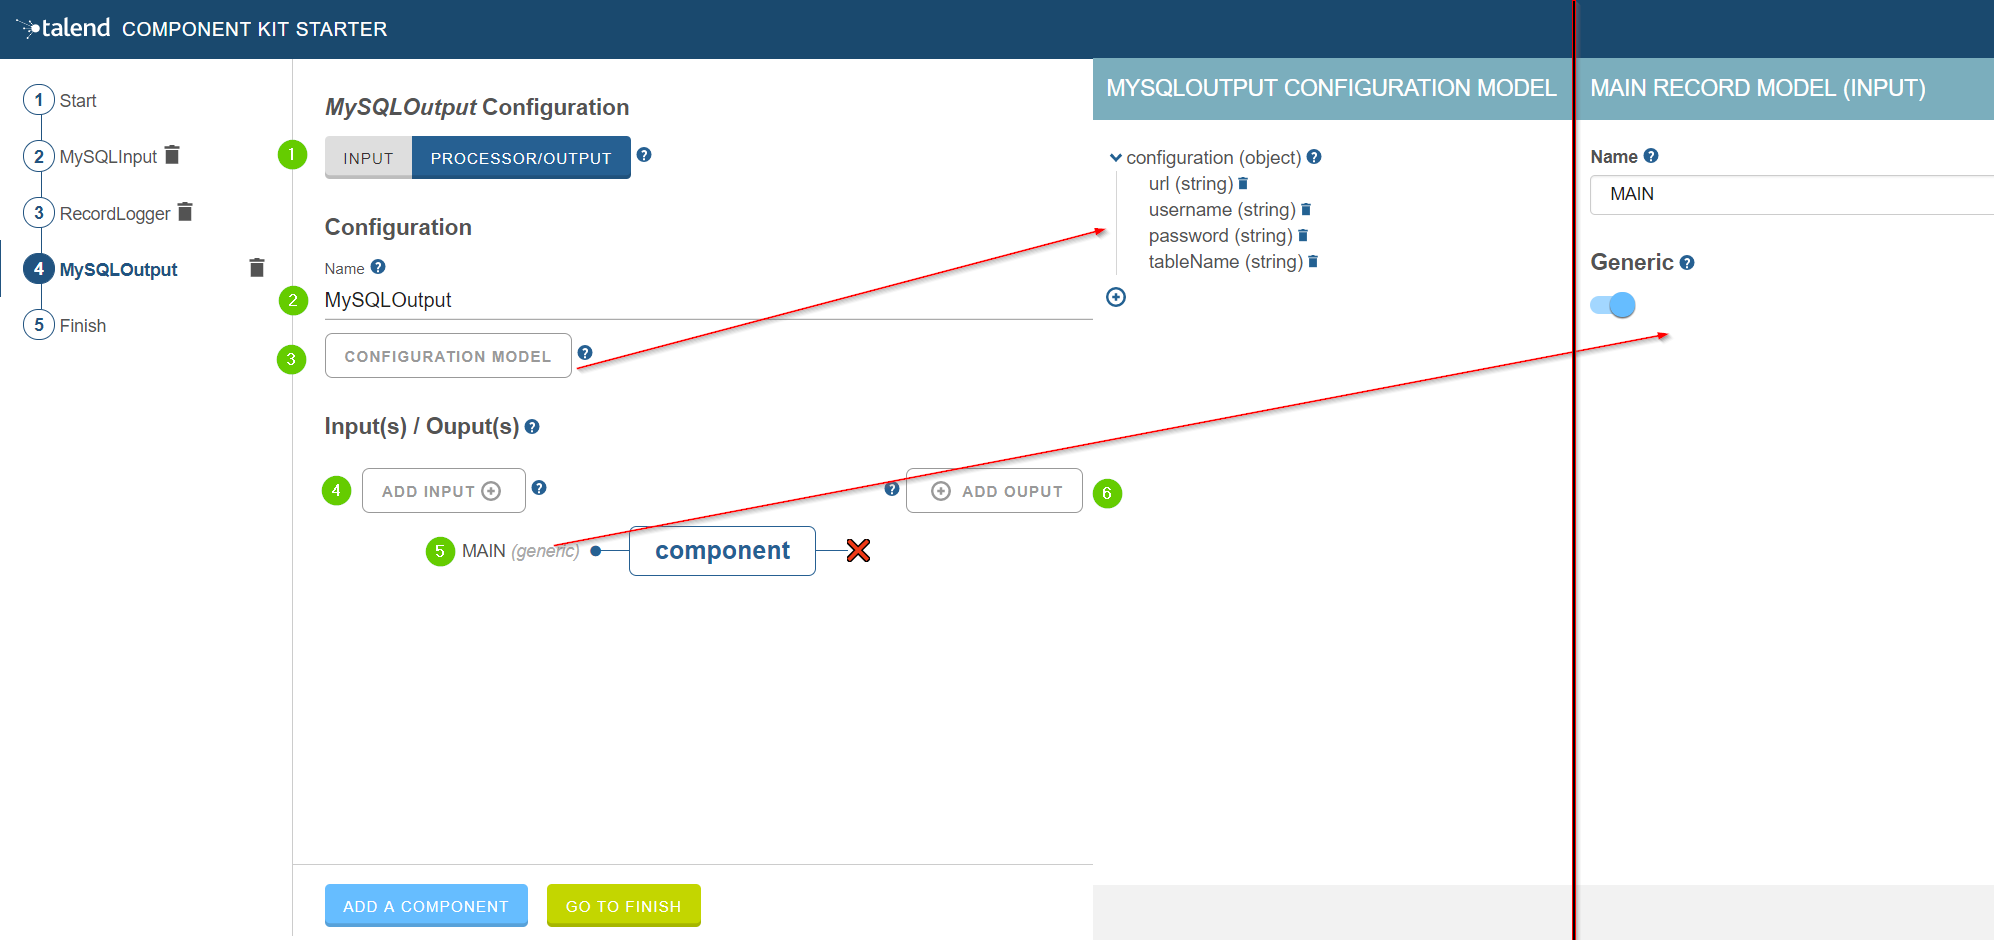
Now we will create an output component that will receive a record and insert it into a database table.
| Output components are Processors without outputs. In other words, the output is a processor that don’t produce any records. |
-
Choose the component type. PROCESSOR/OUTPUT in this case.
-
Give the component a name. MySQLOutput
-
Create the component configuration. in this case we will need the connection url, the credentials of the database and the table name to insert the record in.
-
Like what we have done for the processor component above. we add an input
-
We make our input generic as we want to handle generic records in this component.
-
We don’t create any outputs for this component as it will not produce any records. this is the only difference betweene an output an a processor.
Generate and download the final project.
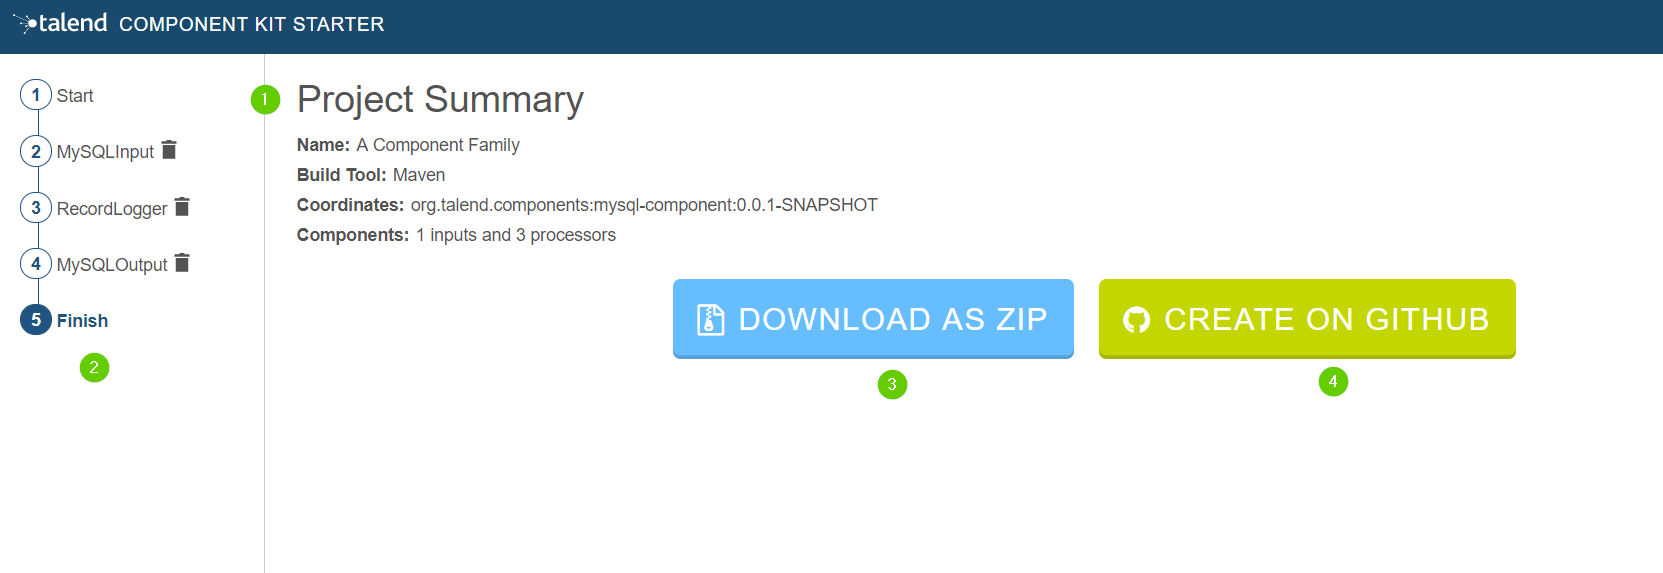
In the previous steps we have configured a project and created 3 components of different types (input, processor and output). Now click the GO TO FINISH button beside the ADD A COMPONENT button. You will be redirected to a summary page that shows :
-
Project configuration summary.
-
The list of the created components at the left panel.
-
You have two options to get the generated project. Download it locally as a zip file using the DOWNLOAD AS ZIP
-
Create a github repository and push the project to it using the button CREATE ON GITHUB.
Compile and explore the generated project files
Download the project as a zip to your local machine or clone it if you have created a github project.
As we have created a maven project here, we will use maven command to compile the project.
In the project directory we execute the command mvn package
If you don’t have Maven installed on your machine, you can use the maven wrapper provided in the generated project.
All you need is to execute the command: ./mvnw package
If you have created a gradle project you can compile with gradle build or use the gradle wrapper ./gradlew build
|
The generated project code contains documentation that will guide you to implement the component logic. so import the project to your favorite IDE and start implementing coding.
In the next tutorial, we will explain how to implement an Input component in details.