Design
The Studio integration relies on the Component Server (see Web for more details).
When the plugin is deployed, it starts a local server that the Studio uses to gather data about the components.
Installing the components
-
Copy
org.talend.sdk.component.studio-integration.jarin the$STUDIO_HOME/pluginsdirectory of the Studio. -
Restart the Studio.
-
Make sure that the
component-serverdependencies andcommons-cli1.4 are in the Studio Maven repository.
If you install any other component, ensure its dependencies are in the repository as well.
you can set the maven.repository value to global in $STUDIO_HOME/configuration/config.ini to reuse your local Maven repository.
|
Configuring the components
The configuration is done in the $STUDIO_HOME/configuration/config.ini file.
Name |
Description |
Default |
component.environment |
Enables the developer mode when set to |
- |
component.debounce.timeout |
Specifies the timeout (in milliseconds) before calling listeners in components Text fields |
750 |
component.kit.skip |
If set to |
false |
component.java.arguments |
Component server additional options |
- |
component.java.m2 |
Maven repository that the server uses to resolve components |
Defaults to the global Studio configuration |
component.java.coordinates |
A list of comma-separated GAV (groupId:artifactId:version) of components to register |
- |
component.java.registry |
A properties file with values matching component GAV (groupId:artifactId:version) registered at startup |
- |
component.java.port |
Sets the port to use for the server |
random |
components.server.beam.active |
Active, if set to true, beam support (Experimental). It requires beam sdk java core dependencies to be available. |
false |
component.server.jul.forceConsole |
Adds a console handler to JUL to see logs in the console. This can be helpful in development because the formatting is clearer than the OSGi one in It uses the |
false |
To activate the plugin and be able to deploy your component, set component.kit.skip to true.
|
A common developer configuration/config.ini file uses the following specific entries:
# use local .m2 instead of embedded studio one
maven.repository = global

# load these component modules
component.java.coordinates = \
    group1:artifact1:0.0.1,\
    group2:artifact2:0.2.1

# during development, see developer model part
component.environment = dev

# log into the console the component interactions - optional
component.server.jul.forceConsole = true
java.util.logging.SimpleFormatter.format = [%4$s] %5$s%6$s%n
Random port when running concurrent studio instances
If you run multiple Studio instances automatically in parallel, you can run into some issues with the random port computation. For example on a CI platform. For that purpose, you can create the $HOME/.talend/locks/org.talend.sdk.component.studio-integration.lock file.
Then, when a server starts, it acquires a lock on that file and prevents another server to get a port until it is started. It ensures that you can’t have two concurrent processes getting the same port allocated.
However, it is highly unlikely to happen on a desktop. In that case, forcing a different value through component.java.port in your config.ini file is a better solution for local installations.
Developer mode
The developer mode adds a Talend Component Kit button in the main toolbar:
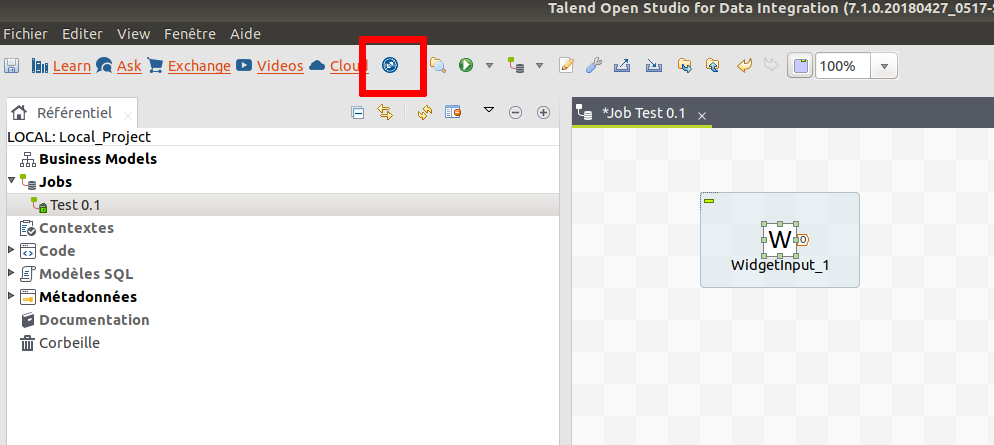
When clicking this button, all components developed with the Talend Component Kit framework are reloaded. The cache is invalidated and the components refreshed.
| You still need to add and remove the components to see the changes. |
The developer mode can be very useful to see some updates in components without having to restart entirely the Studio.