This tutorial walks you through the most common iteration steps to create a component with Talend Component Kit and to deploy it to Talend Open Studio.
The component created in this tutorial is a simple processor that reads data coming from the previous component in a job or pipeline and displays it in the console logs of the application, along with an additional information entered by the final user.
| The component designed in this tutorial is a processor and does not require nor show any datastore and dataset configuration. Datasets and datastores are required only for input and output components. |
Prerequisites
To get your development environment ready and be able to follow this tutorial:
-
Download and install a Java JDK 1.8 or greater.
-
Download and install Talend Open Studio. For example, from Sourceforge.
-
Download and install IntelliJ.
-
Download the Talend Component Kit plugin for IntelliJ. The detailed installation steps for the plugin are available in this document.
Generate a component project
The first step in this tutorial is to generate a component skeleton using the Starter embedded in the Talend Component Kit plugin for IntelliJ.
-
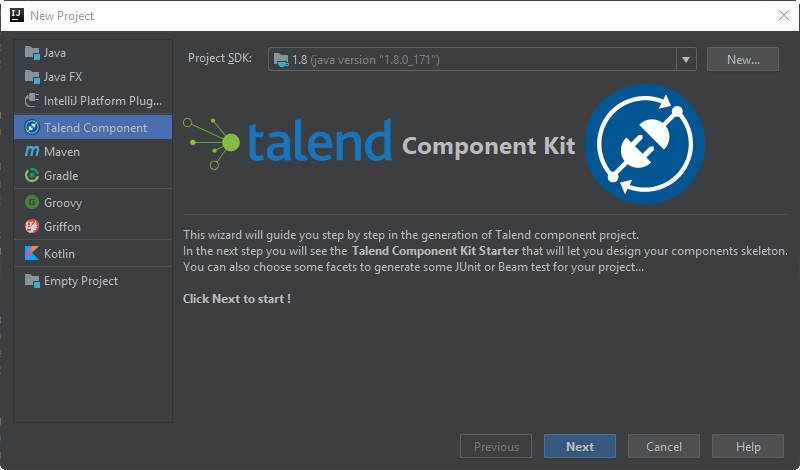
Start IntelliJ and create a new project. In the available options, you should see Talend Component.
-
Make sure that a Project SDK is selected. Then, select Talend Component and click Next.
The Talend Component Kit Starter opens. -
Enter the component and project metadata. Change the default values, for example as presented in the screenshot below:
-
The Component Family and the Category will be used later in Talend Open Studio to find the new component.
-
Project metadata is mostly used to identify the project structure. A common practice is to replace 'company' in the default value by a value of your own, like your domain name.
-
-
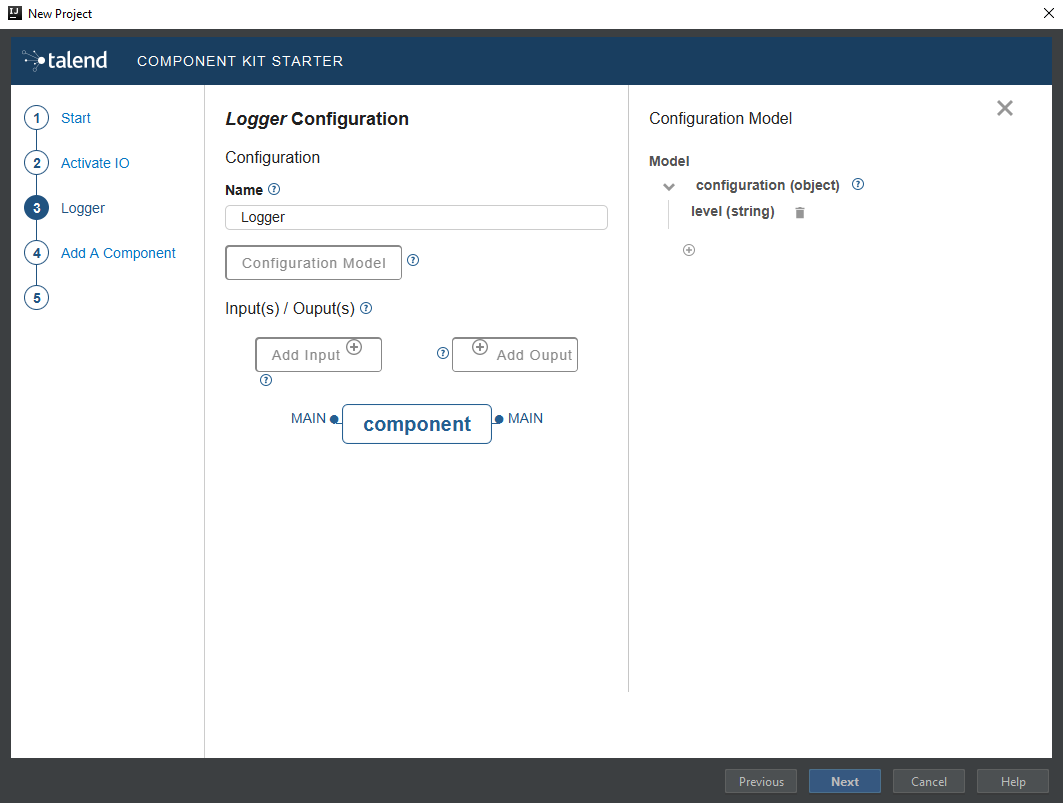
Once the metadata is filled, select Add a component. A new screen is displayed in the Talend Component Kit Starter that lets you define the generic configuration of the component. By default, new components are processors.
-
Enter a valid Java name for the component. For example, Logger.
-
Select Configuration Model and add a string type field named
level. This input field will be used in the component configuration for final users to enter additional information to display in the logs. -
In the Input(s) / Output(s) section, click the default MAIN input branch to access its detail, and make sure that the record model is set to Generic. Leave the Name of the branch with its default
MAINvalue. -
Repeat the same step for the default MAIN output branch.
Because the component is a processor, it has an output branch by default. A processor without any output branch is considered an output component. You can create output components when the Activate IO option is selected. -
Click Next and check the name and location of the project, then click Finish to generate the project in the IDE.
At this point, your component is technically already ready to be compiled and deployed to Talend Open Studio. But first, take a look at the generated project:
-
Two classes based on the name and type of component defined in the Talend Component Kit Starter have been generated:
-
LoggerProcessor is where the component logic is defined
-
LoggerProcessorConfiguration is where the component layout and configurable fields are defined, including the level string field that was defined earlier in the configuration model of the component.
-
-
The package-info.java file contains the component metadata defined in the Talend Component Kit Starter, such as family and category.
-
You can notice as well that the elements in the tree structure are named after the project metadata defined in the Talend Component Kit Starter.
These files are the starting point if you later need to edit the configuration, logic, and metadata of the component.
There is more that you can do and configure with the Talend Component Kit Starter. This tutorial covers only the basics. You can find more information in this document.
Compile and deploy the component to Talend Open Studio
Without modifying the component code generated from the Starter, you can compile the project and deploy the component to a local instance of Talend Open Studio.
The logic of the component is not yet implemented at that stage. Only the configurable part specified in the Starter will be visible. This step is useful to confirm that the basic configuration of the component renders correctly.
Before starting to run any command, make sure that Talend Open Studio is not running.
-
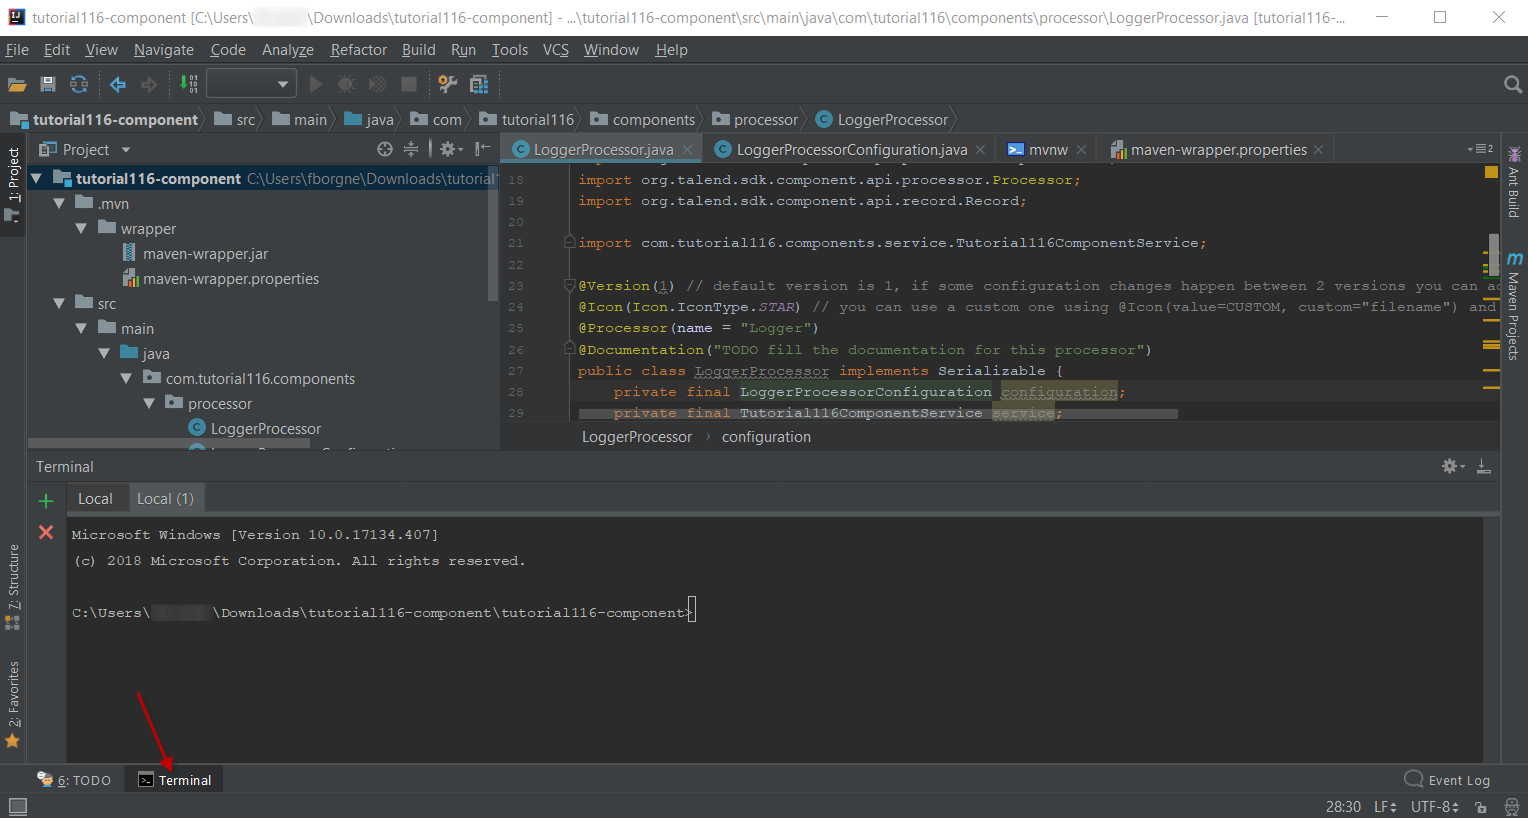
From the component project in IntelliJ, open a Terminal and make sure that the selected directory is the root of the project. All commands shown in this tutorial are performed from this location.
-
Compile the project by running the following command:
mvnw clean install.
Themvnwcommand refers to the Maven wrapper that is embedded in Talend Component Kit. It allows to use the right version of Maven for your project without having to install it manually beforehand. An equivalent wrapper is available for Gradle. -
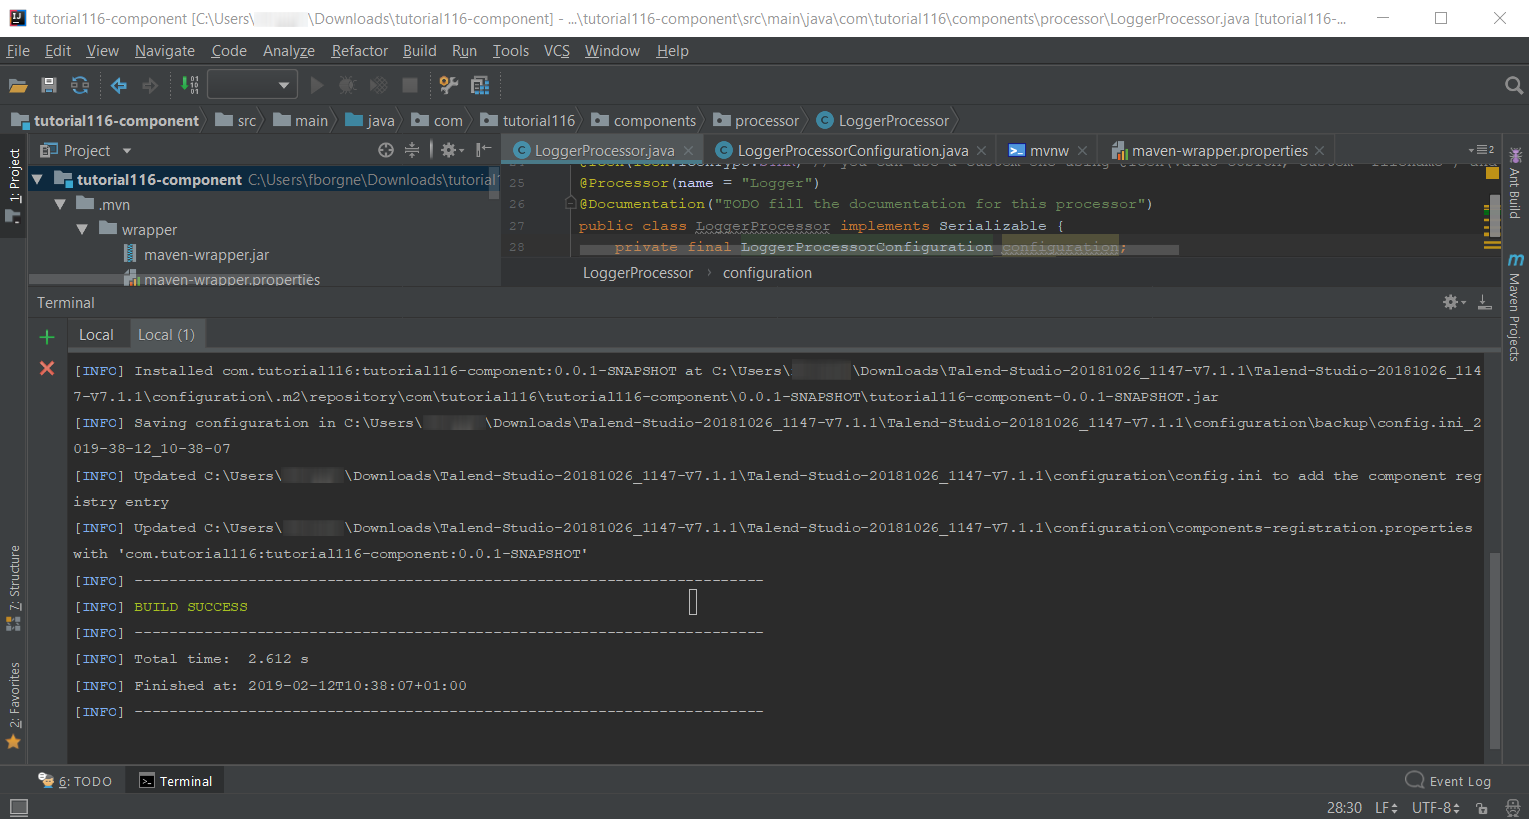
Once the command is executed and you see BUILD SUCCESS in the terminal, deploy the component to your local instance of Talend Open Studio using the following command:
mvnw talend-component:deploy-in-studio -Dtalend.component.studioHome="<path to Talend Open Studio home>".Replace the path with your own value. If the path contains spaces (for example, Program Files), enclose it with double quotes. -
Make sure the build is successful.
-
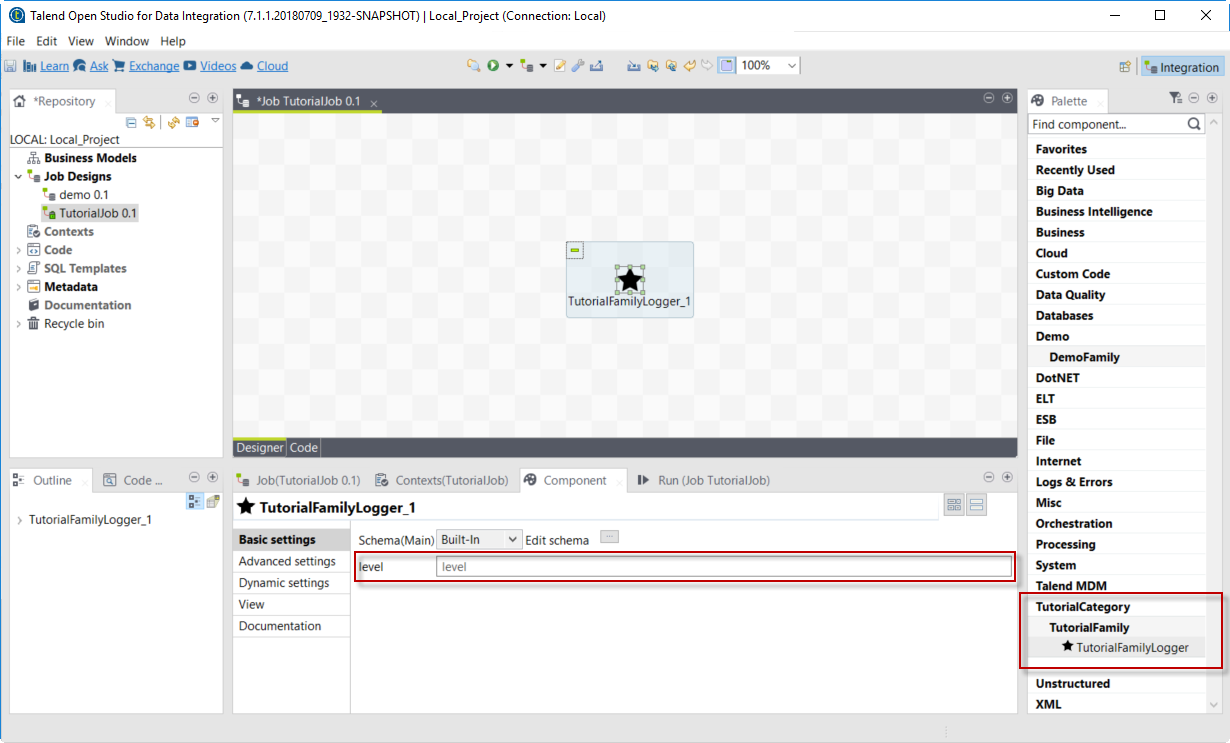
Open Talend Open Studio and create a new Job:
At this point, the new component is available in Talend Open Studio, and its configurable part is already set. But the component logic is still to be defined.
Edit the component
You can now edit the component to implement its logic: reading the data coming through the input branch to display that data in the execution logs of the job. The value of the level field that final users can fill also needs to be changed to uppercase and displayed in the logs.
-
Save the job created earlier and close Talend Open Studio.
-
Go back to the component development project in IntelliJ and open the LoggerProcessor class. This is the class where the component logic can be defined.
-
Look for the
@ElementListenermethod. It is already present and references the default input branch that was defined in the Talend Component Kit Starter, but it is not complete yet. -
To be able to log the data in input to the console, add the following lines:
//Log read input to the console with uppercase level.
        System.out.println("["+configuration.getLevel().toUpperCase()+"] "+defaultInput);
The
@ElementListenermethod now looks as follows:@ElementListener public void onNext( @Input final Record defaultInput) { //Reads the input. //Log read input to the console with uppercase level. System.out.println("["+configuration.getLevel().toUpperCase()+"] "+defaultInput); }
-
Open a Terminal again to compile the project and deploy the component again. To do that, run successively the two following commands:
-
mvnw clean install -
`mvnw talend-component:deploy-in-studio -Dtalend.component.studioHome="<path to Talend Open Studio home>"
-
The update of the component logic should now be deployed. After restarting Talend Open Studio, you will be ready to build a job and use the component for the first time.
To learn the different possibilities and methods available to develop more complex logics, refer to this document.
If you want to avoid having to close and re-open Talend Open Studio every time you need to make an edit, you can enable the developer mode, as explained in this document.
Build a job with the component
As the component is now ready to be used, it is time to create a job and check that it behaves as intended.
-
Open Talend Open Studio again and go to the job created earlier. The new component is still there.
-
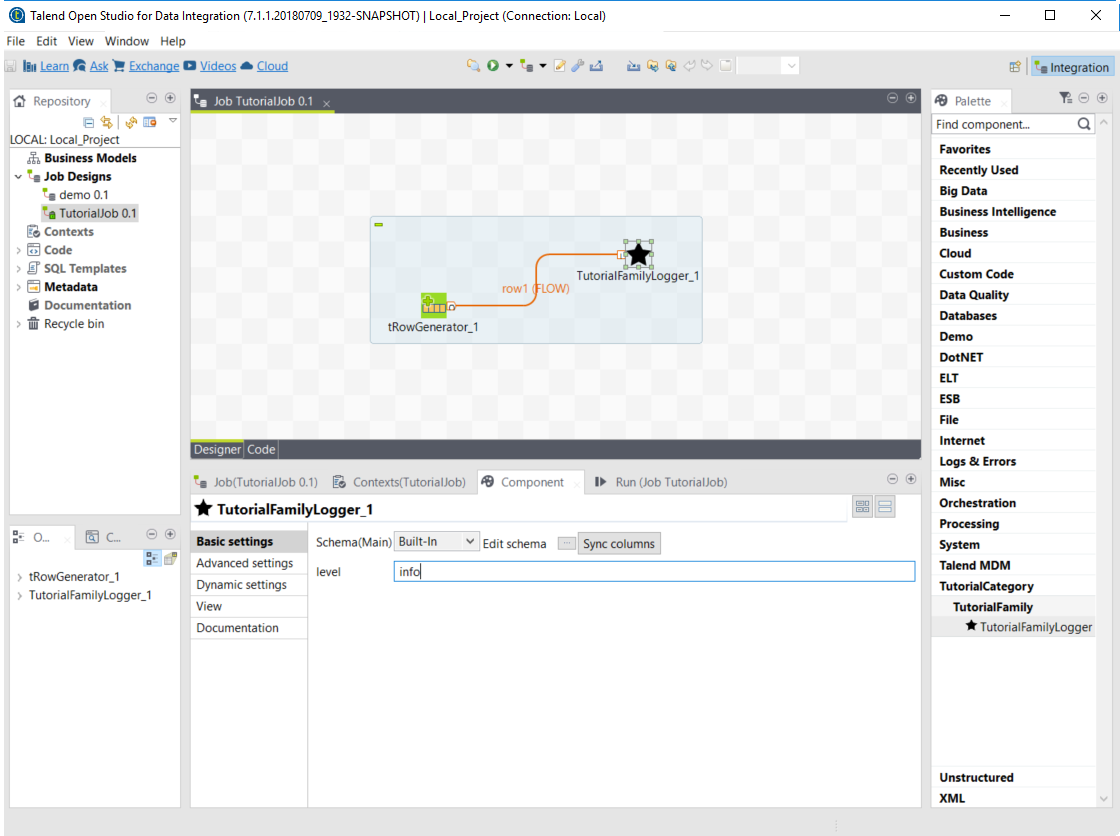
Add a tRowGenerator component and connect it to the logger.
-
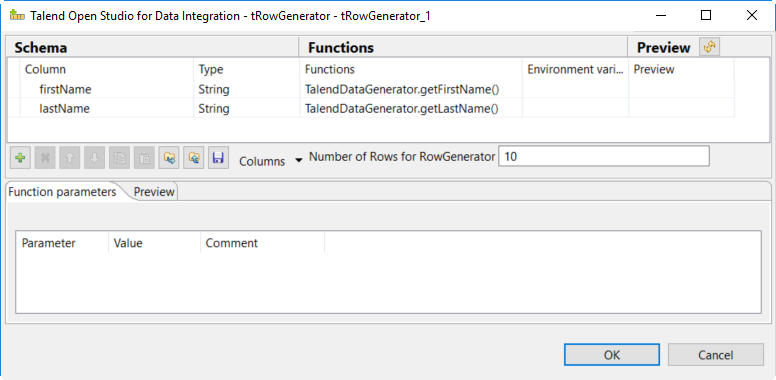
Double-click the tRowGenerator to specify the data to generate:
-
Validate the tRowGenerator configuration.
-
Open the TutorialFamilyLogger component and set the level field to
info. -
Go to the Run tab of the job and run the job.
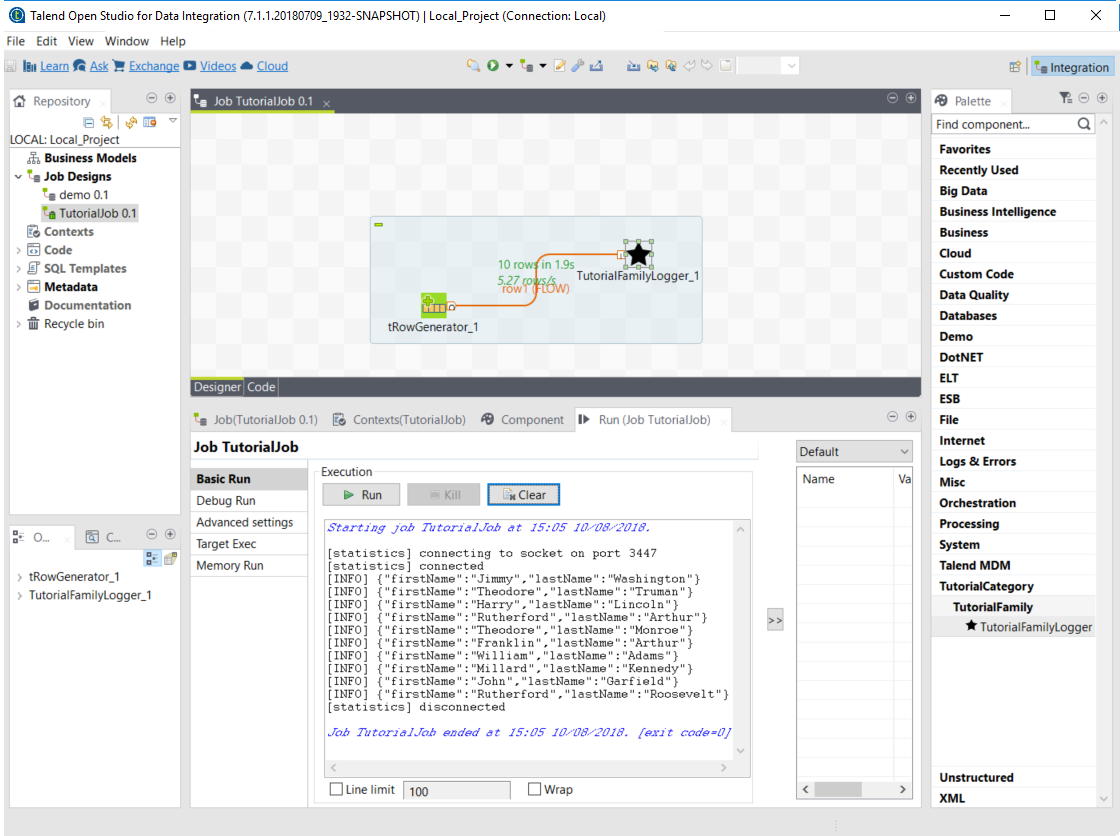
The job is executed. You can observe in the console that each of the 10 generated rows is logged, and that theinfovalue entered in the logger is also displayed with each record, in uppercase.
